Setup Guide
Step-by-step instructions for connecting Cisco Meraki to Pult Presence.
You need to create a service account (recommended) and generate an API key in the Meraki Dashboard, then enter the credentials into the Pult Dashboard.
Credentials you'll collect along the way:
| Credential | Source |
|---|---|
| API Key | Generated from the Meraki Dashboard under the service account |
Step 1: Create a Service Account (Recommended)
We recommend creating a dedicated service account with minimal permissions rather than using a personal admin account. Pult needs two read-only roles: Observer for your networks and access points, and Client monitor for the list of connected clients.
-
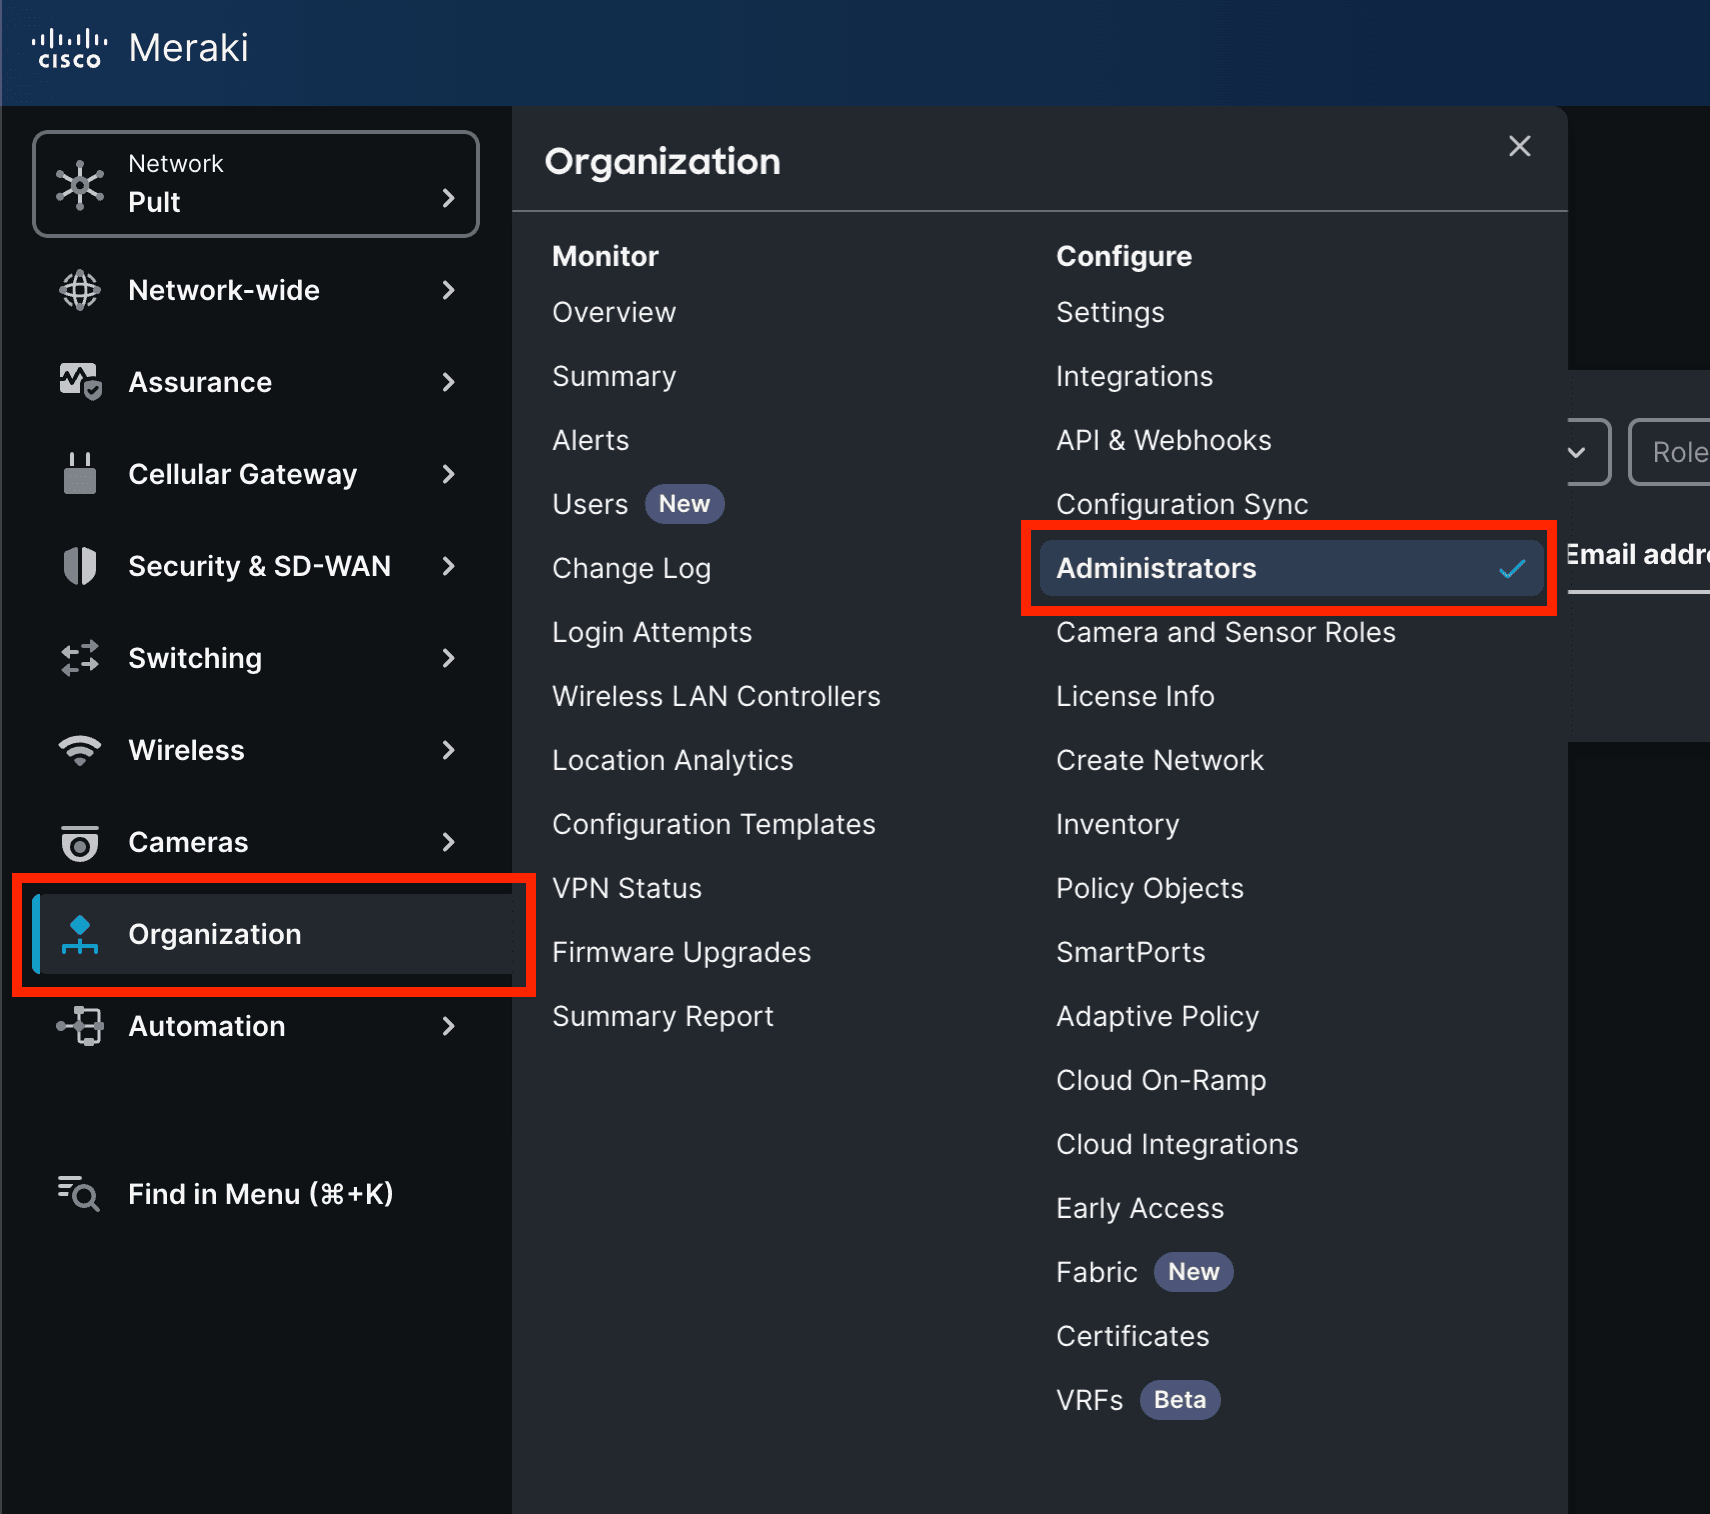
Log in to your Meraki Dashboard and navigate to Organization → Administrators.
-
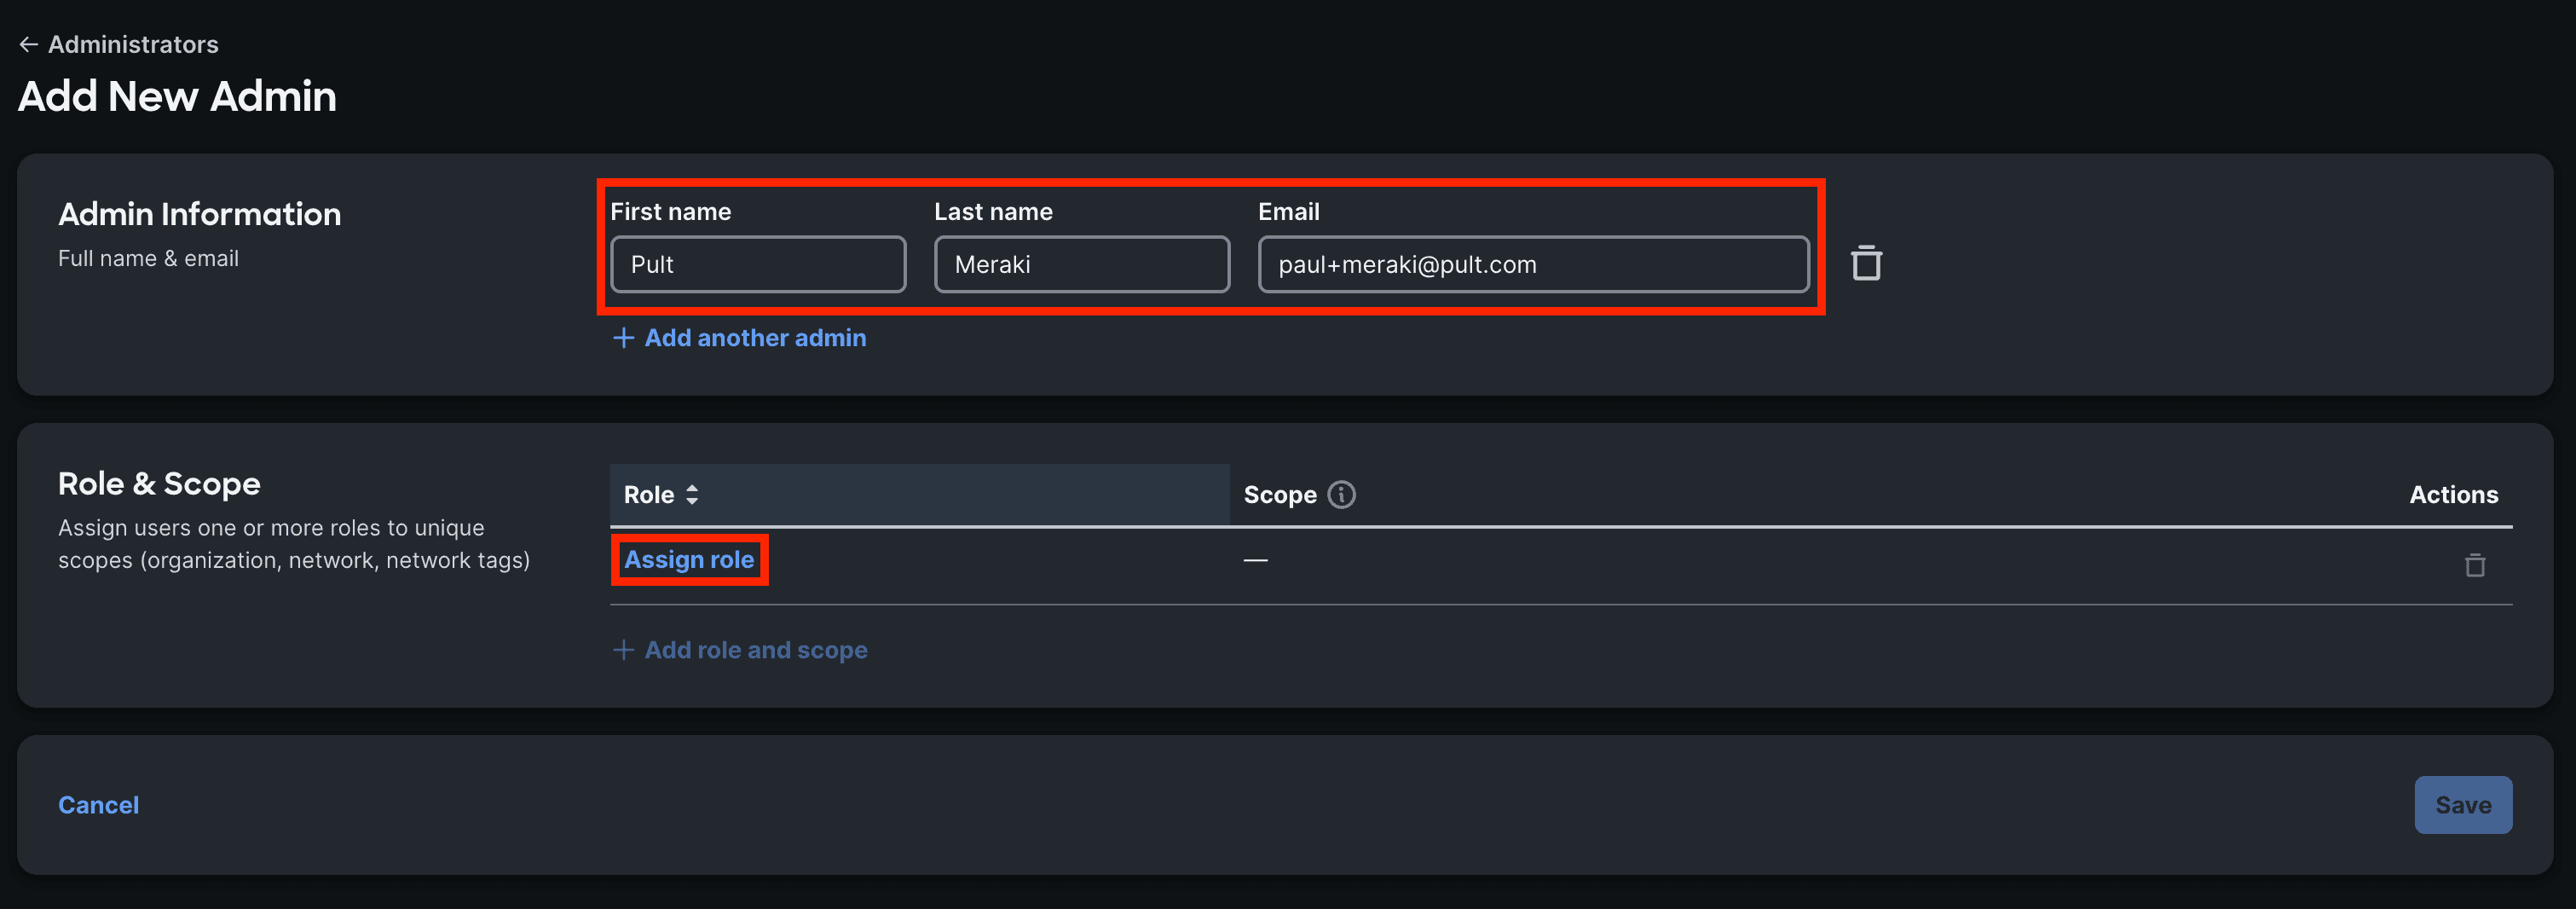
Click Add admin and fill in First name, Last name, and Email for the service account.
-
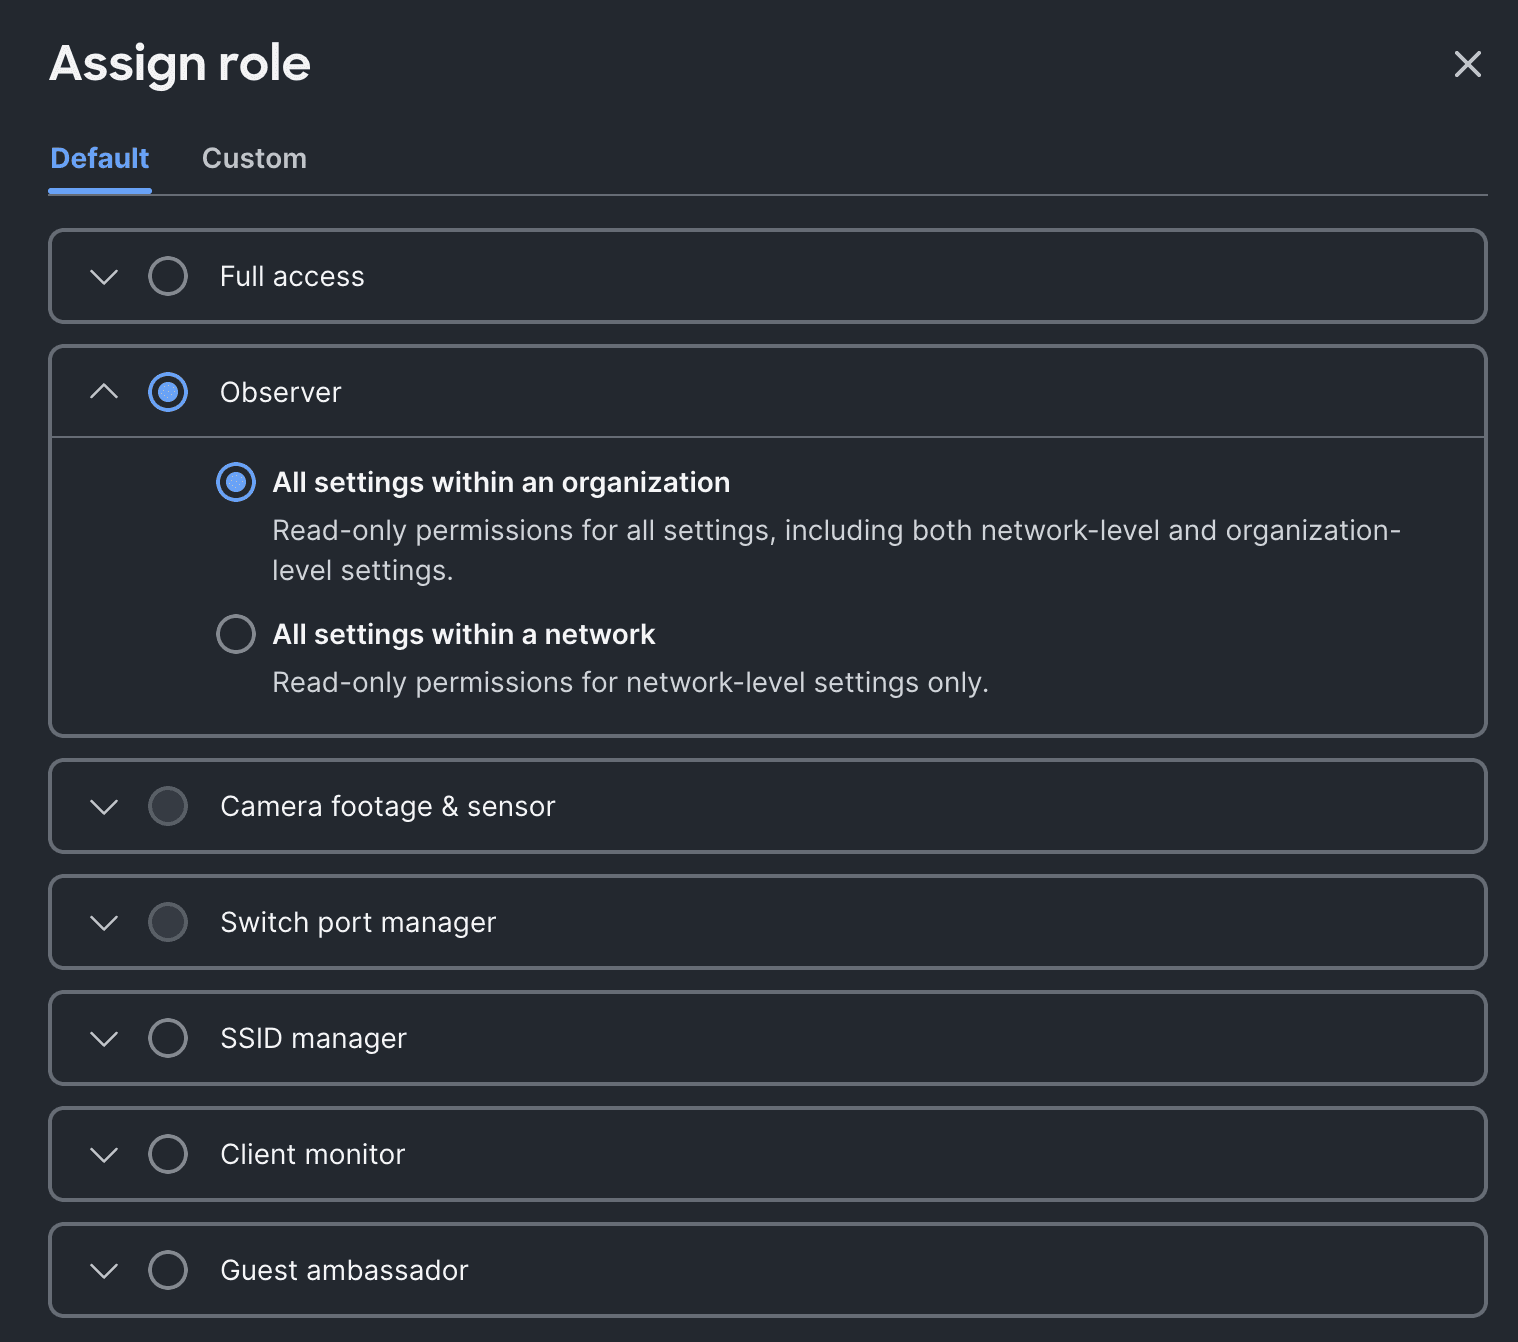
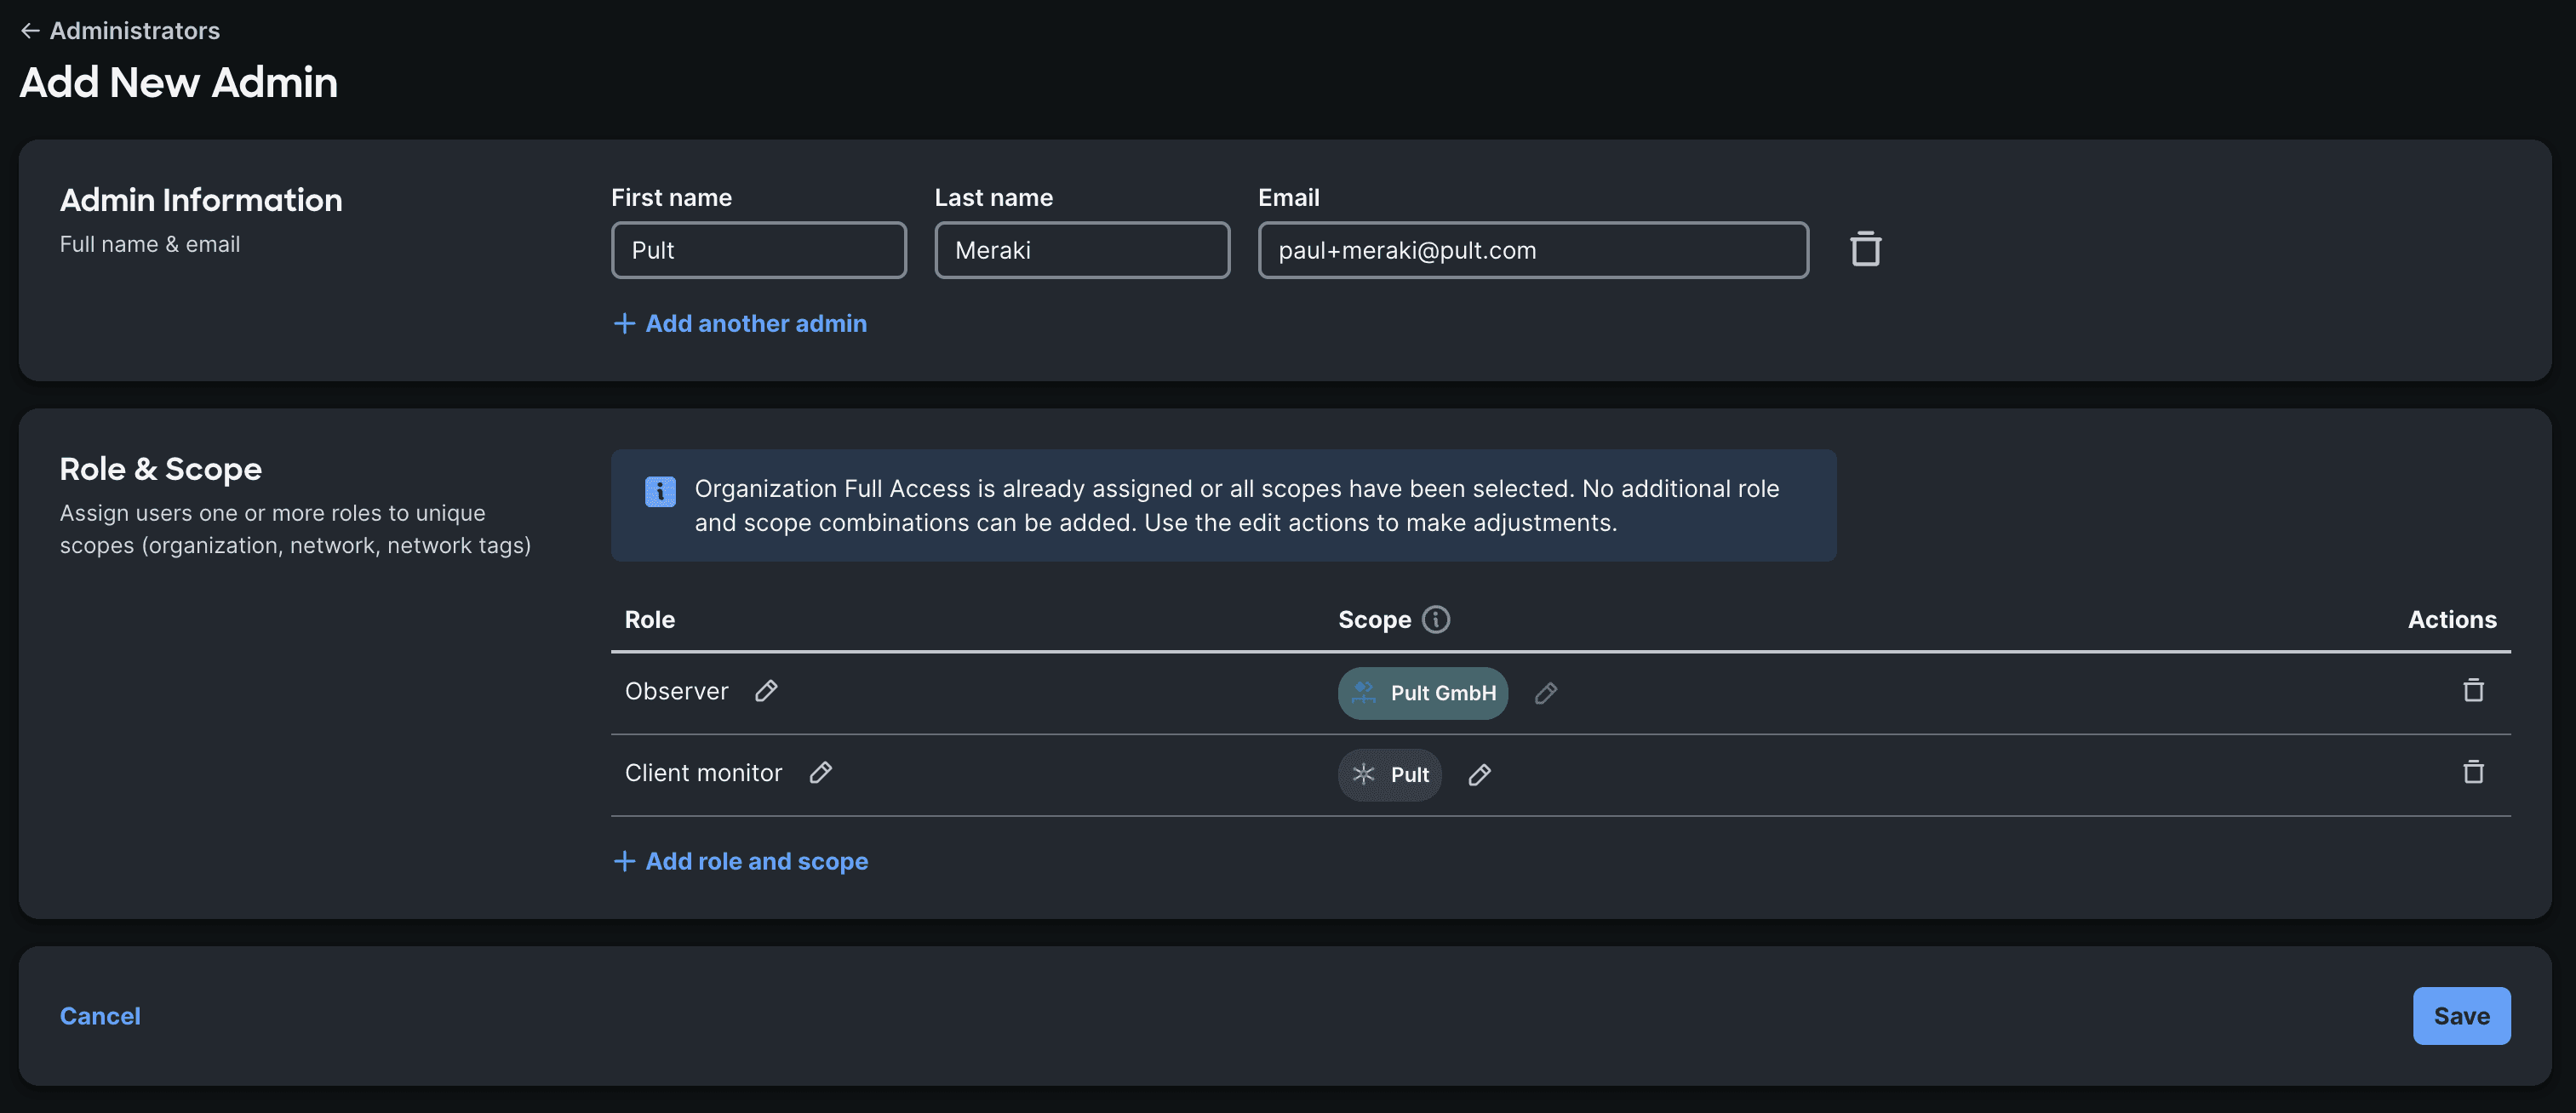
Under Role & Scope, click Assign role, select Observer, then choose All settings within an organization.
-
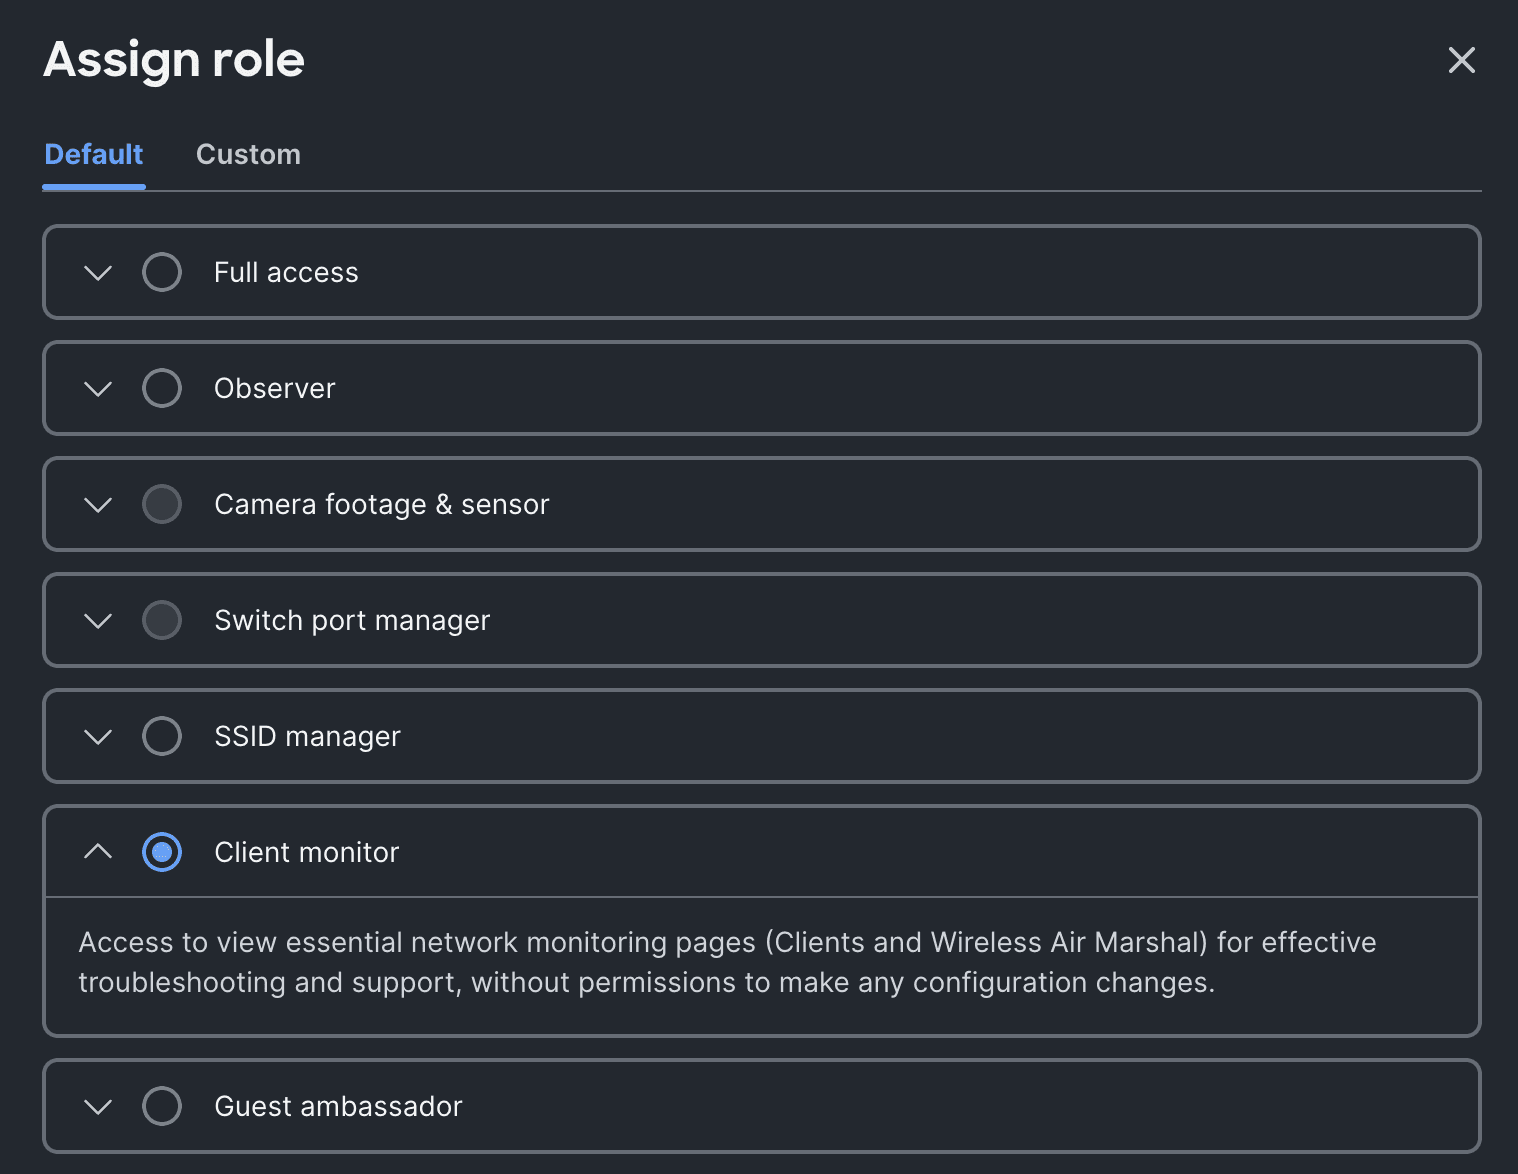
Click Add role and scope, then Assign role, and select Client monitor.
-
Next to Client monitor, click Assign scope.

-
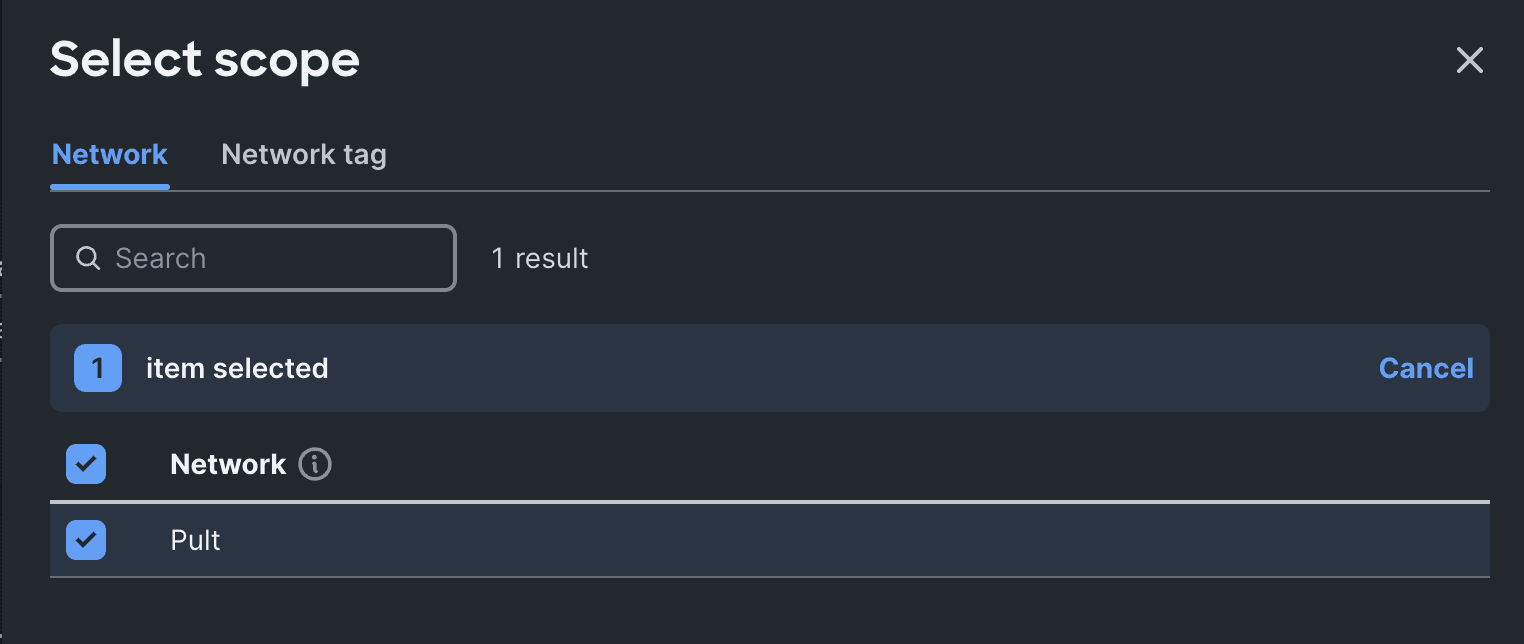
Open the Network tab and select the networks you want Pult to monitor.
-
Confirm that both roles are listed, then click Save.
-
Activate the account by following the invitation email and setting a password.
If your dashboard still shows the older role picker instead of Role & Scope, assign Organization: Observer and Network: Observer for the networks you want Pult to access.
You can skip creating a service account and use an existing admin account, but a dedicated account with minimal permissions is recommended for security.
Step 2: Generate an API Key
- Log in to the Meraki Dashboard with the service account.
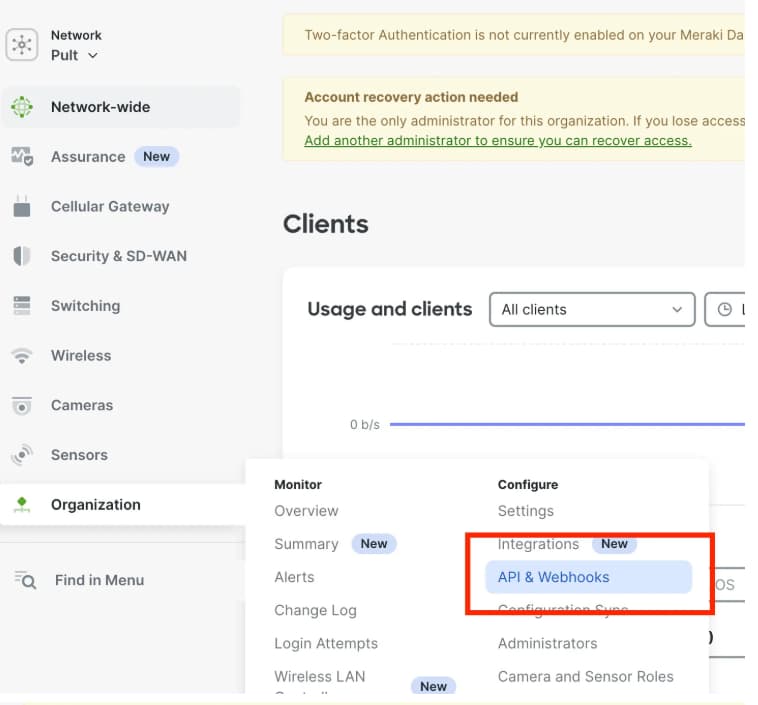
- Navigate to Organization → API & Webhooks → API keys and Access.
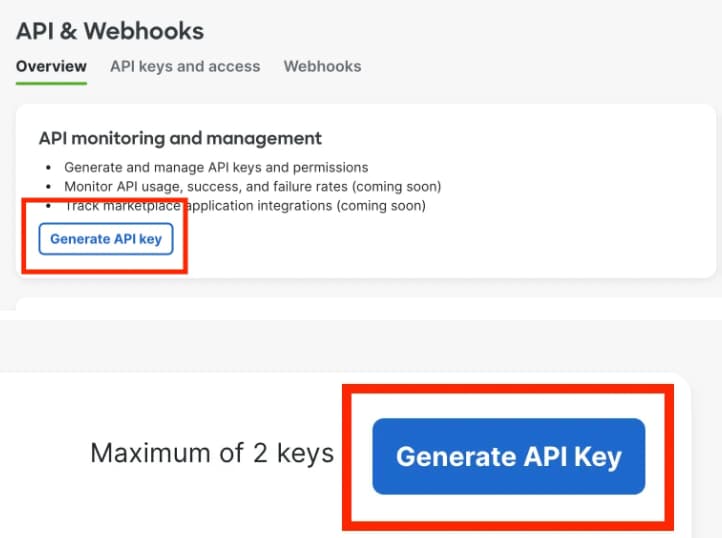
- Click Generate API key.
- Copy the API key and save it securely. It will only be shown once.
Step 3: Configure in Pult
- In the Pult Dashboard, go to Settings → Presence → WiFi Settings.
- Click Add Integration and select Cisco Meraki.
- Enter the API Key from Step 2.
- Click Save.
Pult validates the credentials on save. Once connected, the integration status will show as Connected.
Last updated on Sep 8, 2026, 1:59 PM