Intune Deployment (Windows)
Deploy the Pult Agent on Windows via Microsoft Intune using PSAppDeployToolkit.
This guide describes how to deploy the Pult Agent as a fully automated installation on Intune-managed Windows devices. It addresses handling system vs. user context when provisioning the bootstrap token and auto-launching the application after installation.
This approach uses PSAppDeployToolkit (PSADT). From the project description:
PSAppDeployToolkit is a PowerShell-based, open-source framework for Windows software deployment that integrates seamlessly with existing deployment solutions [...]
See PSAppDeployToolkit on GitHub.
PSADT orchestrates the MSI installation and executes post-install actions. It provides APIs for
running commands in user or system context, which is why a standard Intune Win32 app deployment does
not work out of the box with MSI properties like BOOTSTRAP_TOKEN. See
Bootstrap Token Deployment for background.
Intune Win32 Apps run in SYSTEM context by default. MSI properties such as BOOTSTRAP_TOKEN
and AUTOLAUNCHAPP do not behave correctly in that context. PSADT runs post-install steps in
the correct logged-in user context.
Prerequisites
- Windows 10 or Windows 11 to prepare installation artifacts
- Microsoft Intune with Admin Center access
- PSAppDeployToolkit Template v4.1.0 or later
- Download
PSAppDeployToolkit_Template_v4.zipfrom GitHub Releases
- Download
- Microsoft Win32 Content Prep Tool (
IntuneWinAppUtil) from GitHub Releases - PowerShell
- The Pult Agent
.msiinstaller (v0.2.3 or later) - A bootstrap token generated in the Pult Dashboard (you will paste it into the post-install script in Step 3)
Part 1: Prepare the PSADT deployment bundle
Step 1: Extract the PSADT template
Extract PSAppDeployToolkit_Template_v4.zip into a new, temporary working directory (referred
to as PSAppDeployToolkit_Template_v4 in this guide).
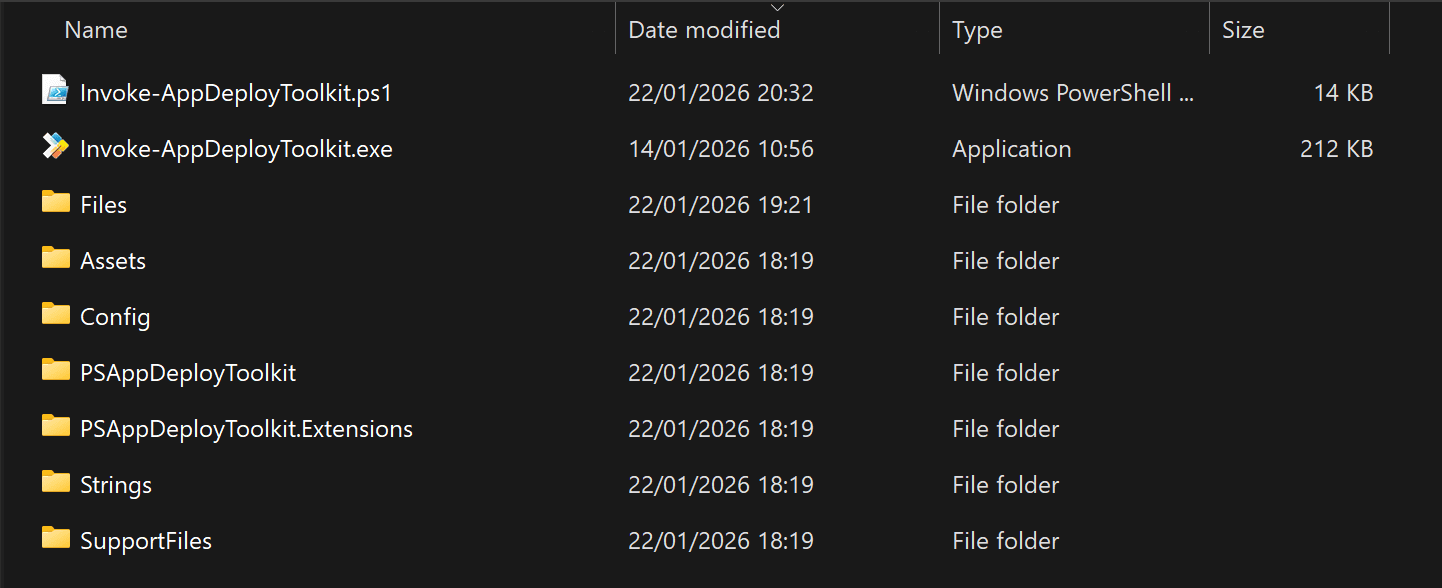
After extraction you should see:
Invoke-AppDeployToolkit.ps1Invoke-AppDeployToolkit.exePSAppDeployToolkit/Files/- Other supporting files and folders
The next two steps cover adding the Pult Agent MSI and configuring the post-install script.
Step 2: Add the MSI installer
Copy the Pult Agent MSI (for example pult-installer.msi) into the Files directory:
PSAppDeployToolkit_Template_v4\Files\pult-installer.msi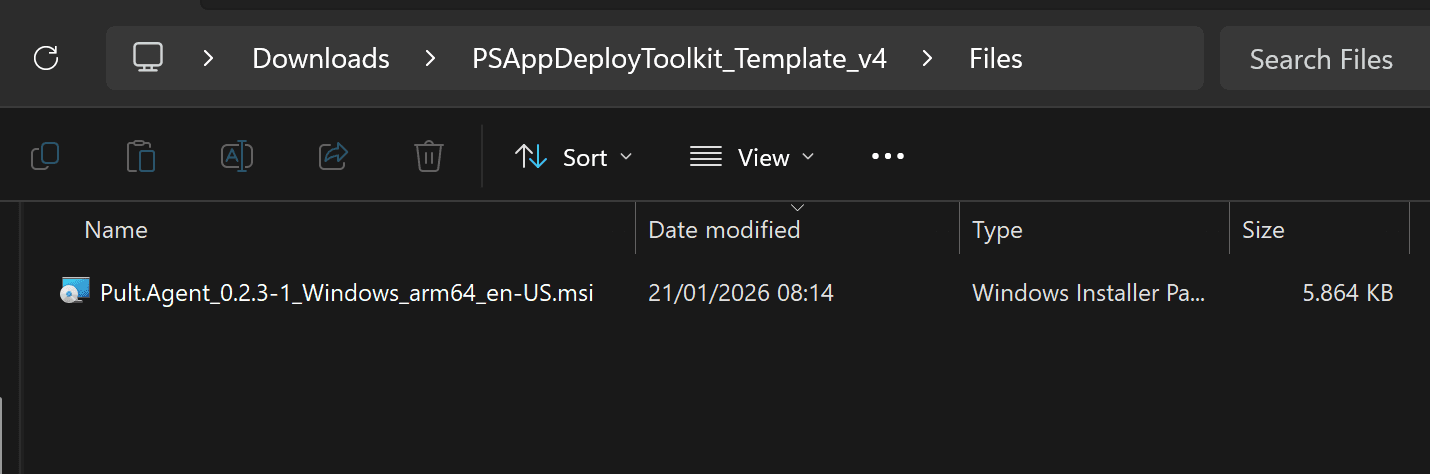
Step 3: Configure the post-install script
Open PSAppDeployToolkit_Template_v4\Invoke-AppDeployToolkit.ps1 and apply both changes below.
Enable Zero-Config MSI mode
Under App Variables, ensure AppName is set to an empty string. That is the default for
the v4 template.
Add post-install tasks
The script defines Install-ADTDeployment, Uninstall-ADTDeployment, and Repair-ADTDeployment.
Each function has sections for running commands before or after the MSI operation. Inside
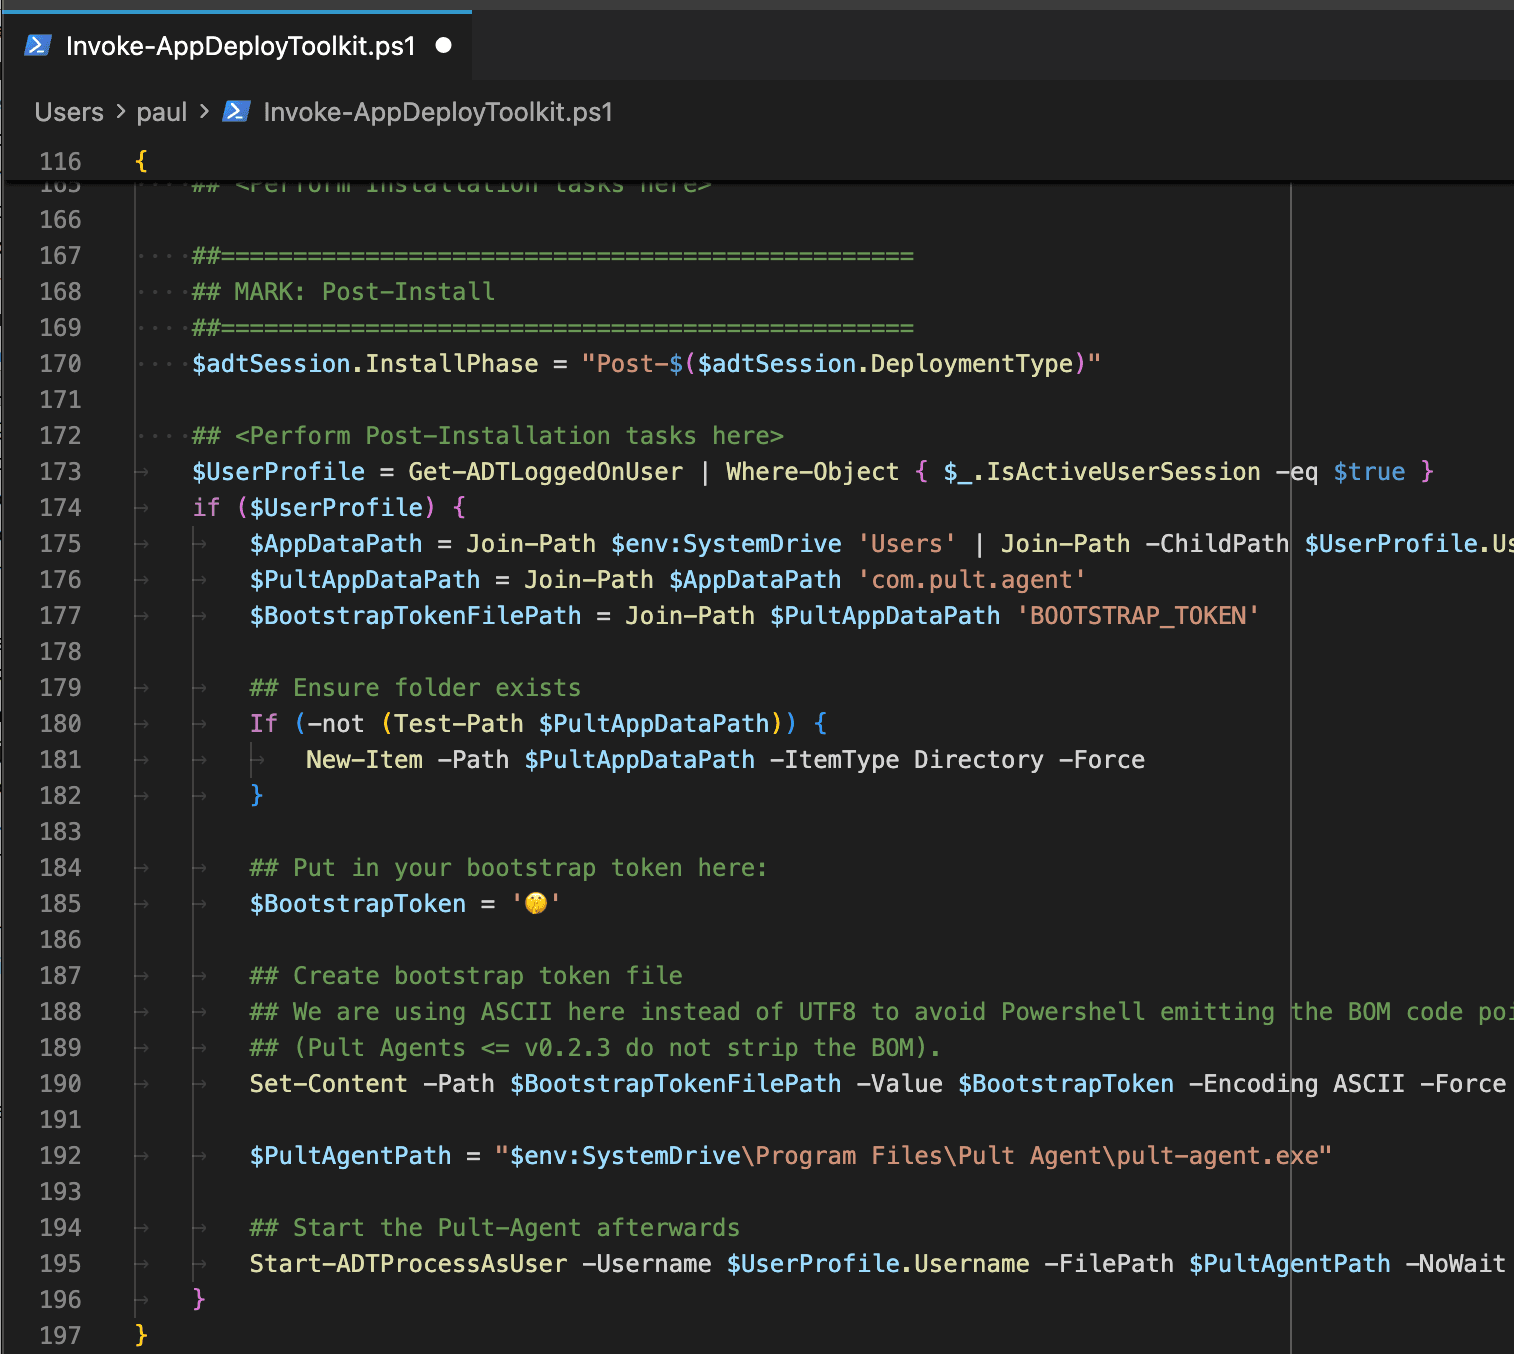
Install-ADTDeployment, find the comment Perform Post-Installation tasks here and add the
following (adjust the bootstrap token string):
## <Perform Post-Installation tasks here>

$UserProfile = Get-ADTLoggedOnUser | Where-Object { $_.IsActiveUserSession -eq $true }
if ($UserProfile) {
    $AppDataPath = Join-Path $env:SystemDrive 'Users' | Join-Path -ChildPath $UserProfile.Username | Join-Path -ChildPath 'AppData\Roaming'
    $PultAppDataPath = Join-Path $AppDataPath 'com.pult.agent'
    $BootstrapTokenFilePath = Join-Path $PultAppDataPath 'BOOTSTRAP_TOKEN'

    ## Ensure folder exists
    If (-not (Test-Path $PultAppDataPath)) {
        New-Item -Path $PultAppDataPath -ItemType Directory -Force
    }

    ## Put in your bootstrap token here:
    $BootstrapToken = 'PUT YOUR PULT BOOTSTRAP TOKEN HERE'

    ## Create bootstrap token file
    ## Using ASCII encoding to avoid PowerShell emitting the BOM
    ## (Pult Agent versions <= v0.2.3 do not strip the BOM).
    Set-Content -Path $BootstrapTokenFilePath -Value $BootstrapToken -Encoding ASCII -Force

    $PultAgentPath = "$env:SystemDrive\Program Files\Pult Agent\pult-agent.exe"

    ## Start the Pult Agent in user context
    Start-ADTProcessAsUser -Username $UserProfile.Username -FilePath $PultAgentPath -NoWait
}
This writes the token where the agent watches for it, then launches pult-agent.exe as the logged-in user.
Use Set-Content ... -Encoding ASCII. Default UTF-8 encoding can write a BOM that older
agent builds mis-read as part of the token.
Remove the desktop shortcut (optional)
The installer creates a "Pult Agent" desktop shortcut that cannot currently be disabled at build
time. If you do not want this shortcut deployed to your users, add the snippet below directly after
the previous block (still inside Install-ADTDeployment). Depending on Windows and the install
context, the shortcut may end up on the Public desktop or on the active user's desktop, so both
locations are cleaned up:
## Remove the desktop shortcut created by the installer
$DesktopShortcutName = 'Pult Agent.lnk'

$DesktopShortcutCandidates = @(
    (Join-Path $env:PUBLIC "Desktop\$DesktopShortcutName")
)

if ($UserProfile) {
    $UserDesktop = Join-Path $env:SystemDrive 'Users' | Join-Path -ChildPath $UserProfile.Username | Join-Path -ChildPath 'Desktop'
    $DesktopShortcutCandidates += (Join-Path $UserDesktop $DesktopShortcutName)
}

foreach ($Candidate in $DesktopShortcutCandidates) {
    Remove-Item -Path $Candidate -Force -ErrorAction SilentlyContinue
}
This reuses the $UserProfile variable defined in the bootstrap token block above, so the snippet
must appear after it.
Testing locally
You can test your changes before packaging by running the following command from the
PSAppDeployToolkit_Template_v4 folder:
Invoke-AppDeployToolkit.exe -DeploymentType Install -DeployMode SilentTo more accurately simulate the Intune deployment environment (which runs in SYSTEM context), use PsExec:
PsExec64.exe -s <path>\PSAppDeployToolkit_Template_v4\Invoke-AppDeployToolkit.exe -DeploymentType Install -DeployMode SilentFurther customization: PSADT documentation.
Step 4: Create the Intune package
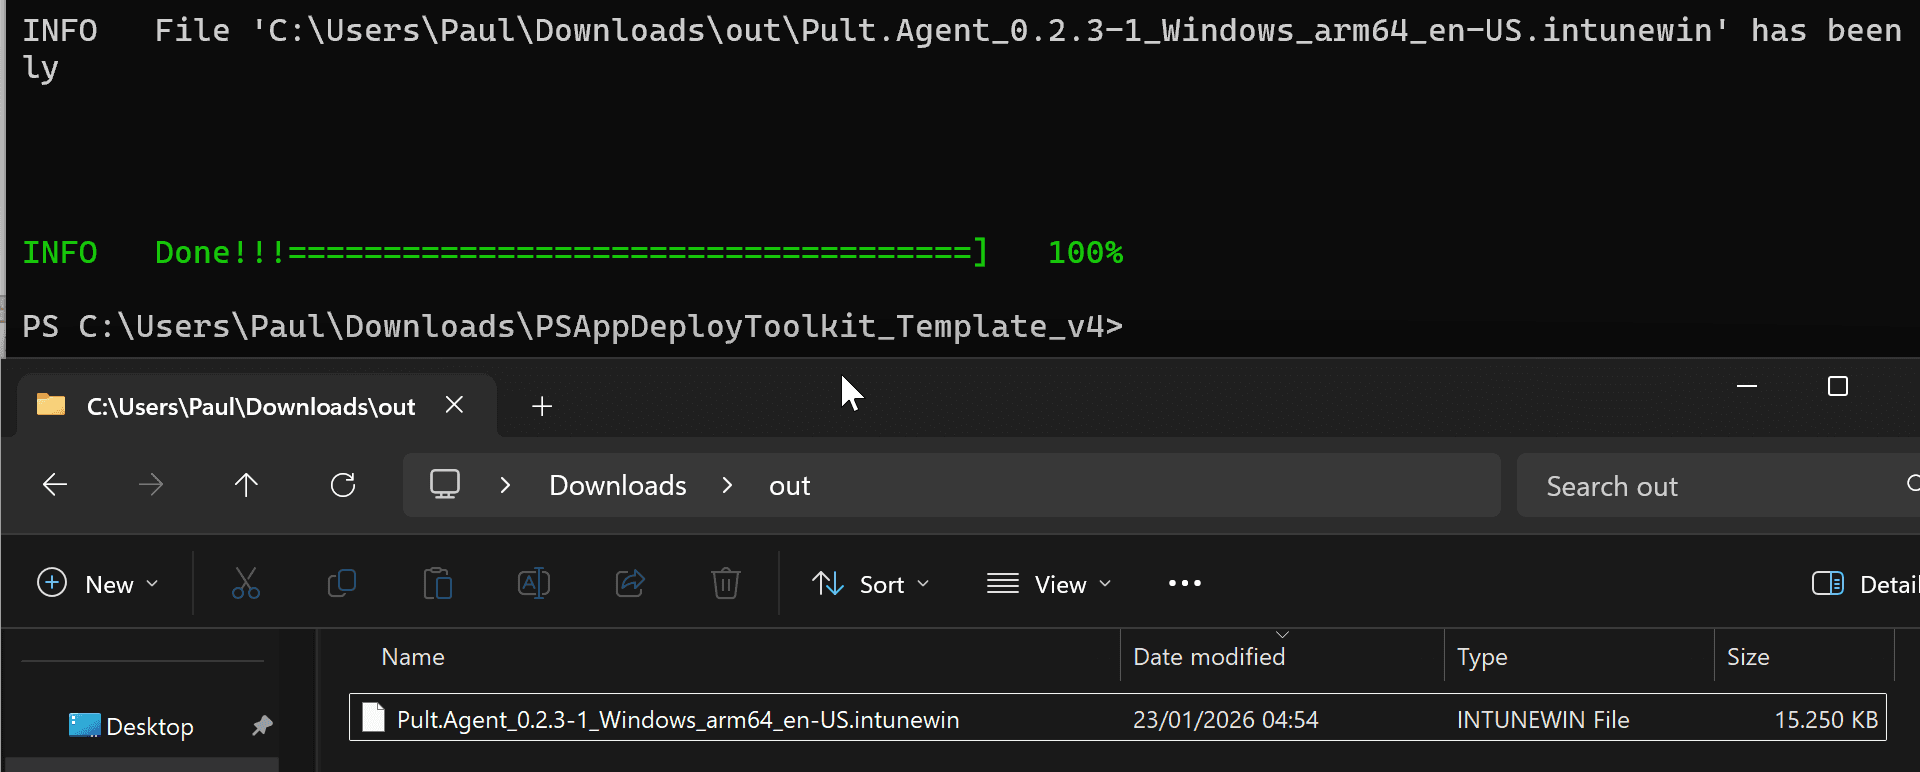
Package the folder with the Microsoft Win32 Content Prep Tool:
IntuneWinAppUtil.exe -c "<path>\PSAppDeployToolkit_Template_v4" -s "<path>\PSAppDeployToolkit_Template_v4\Files\pult-installer.msi" -o "<output_folder>"-c is the PSADT template root (where Invoke-AppDeployToolkit.exe lives). -s is the setup
file inside Files/ (your MSI). The tool emits an .intunewin file -- upload that to Intune.
Part 2: Configure app deployment in Intune
Step 1: Open the Intune admin center
Sign in to the Microsoft Intune admin center.
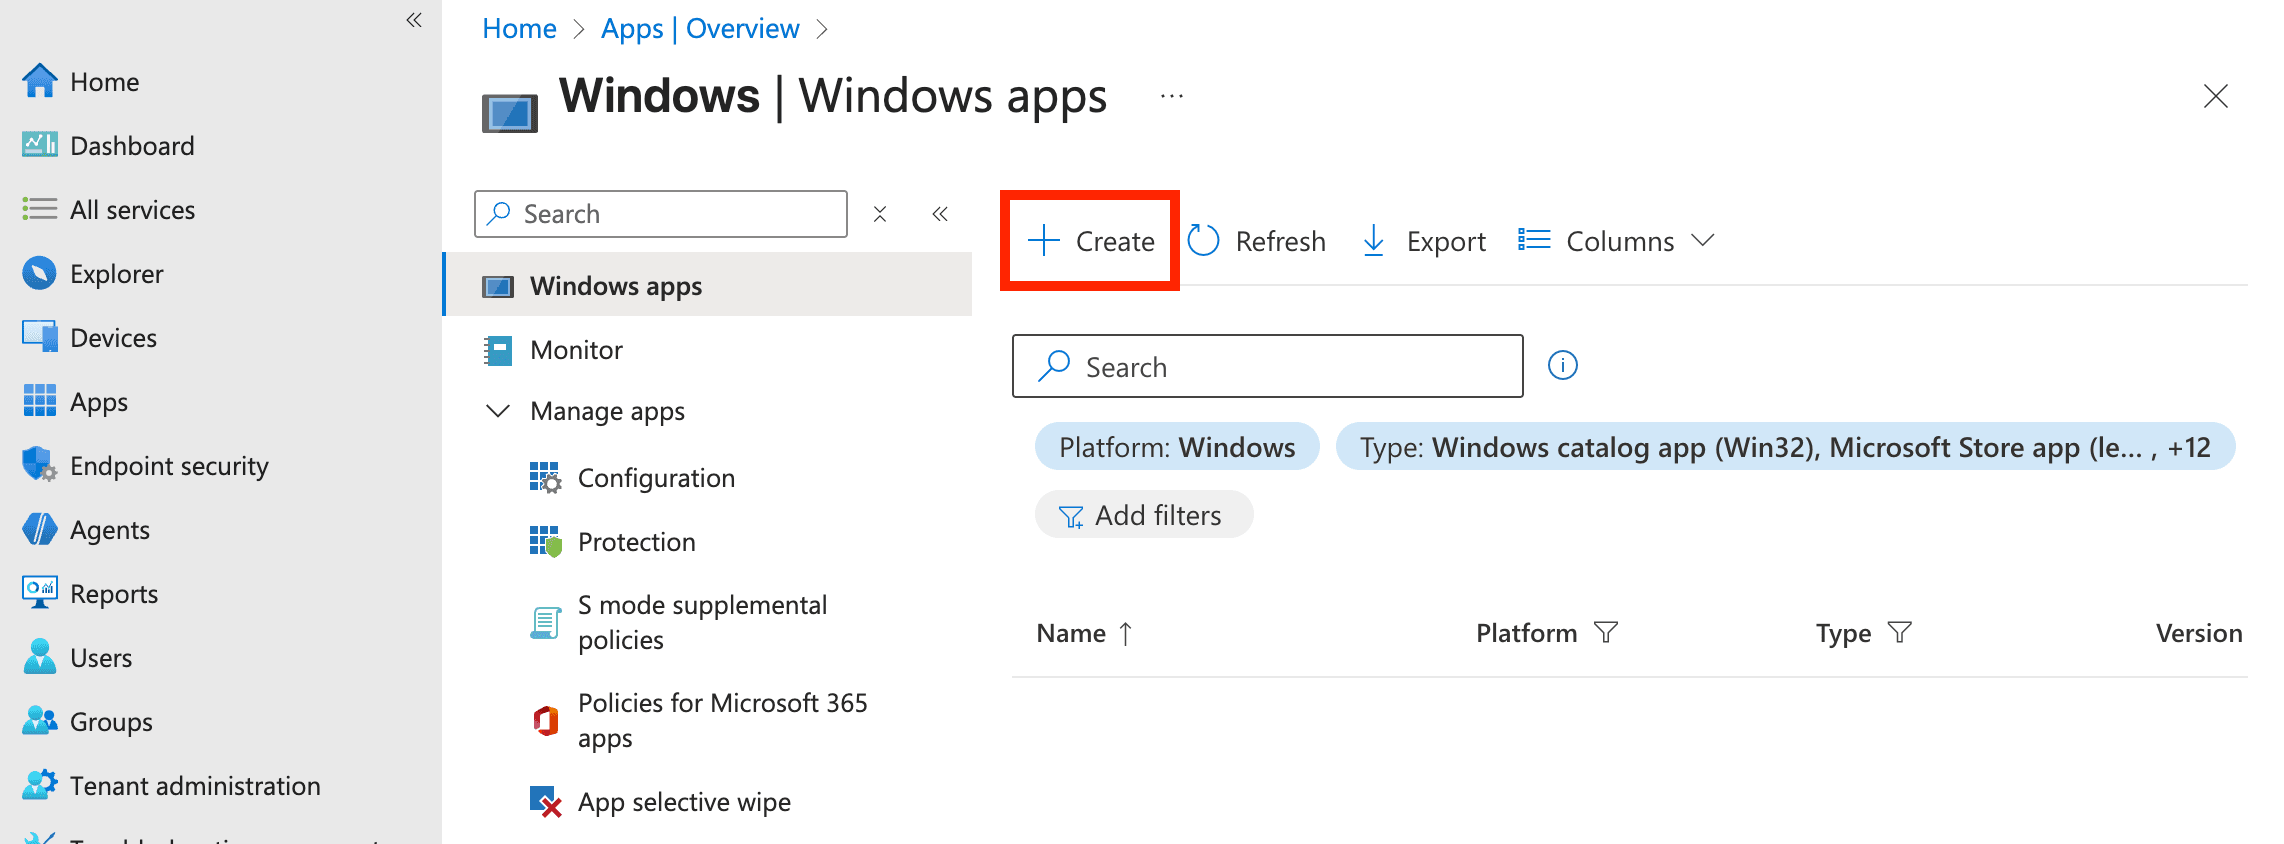
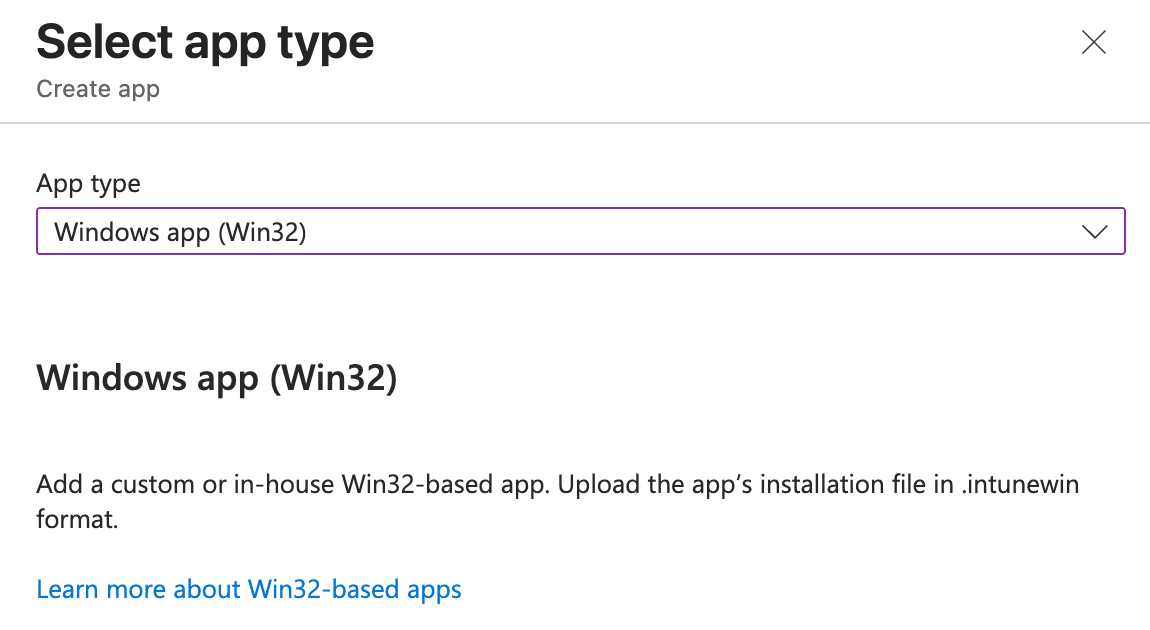
Step 2: Create a new Win32 app
Go to Apps → Windows → Add and choose Windows app (Win32).
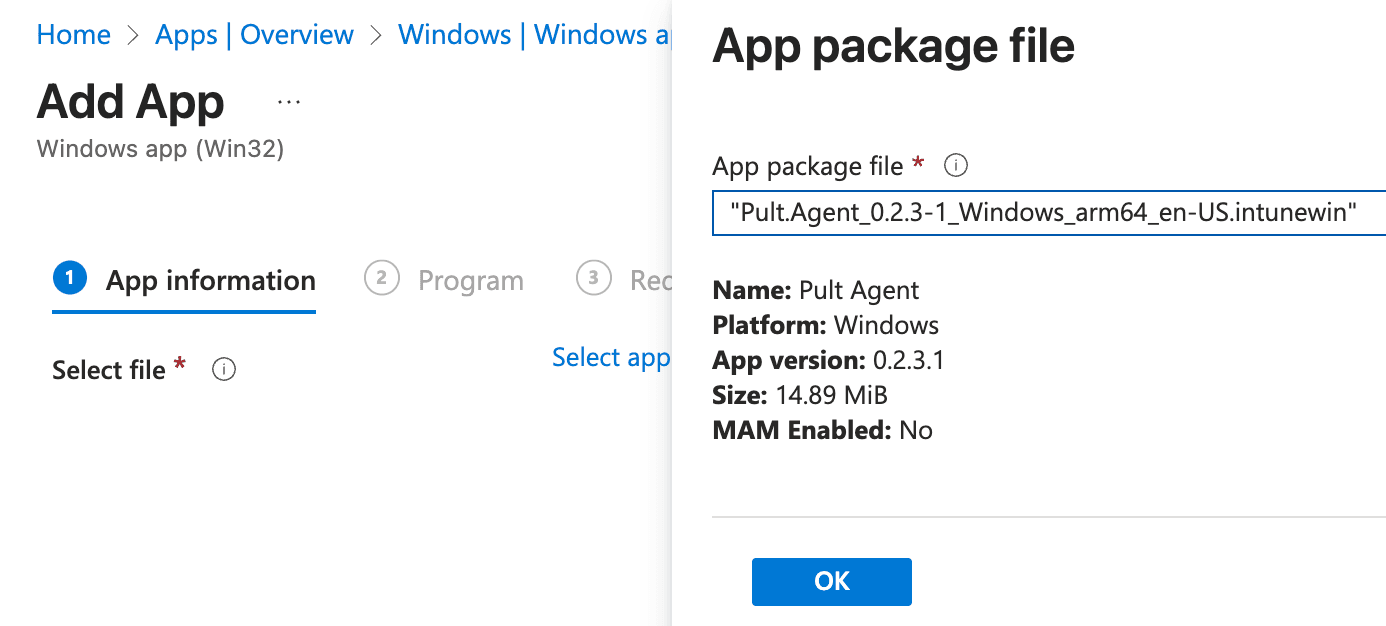
Upload the .intunewin file from Part 1. Intune automatically extracts app information such as the
name and version.
After uploading a new .intunewin to an existing app, Intune may silently reset the
install and uninstall commands. Always re-check the Program step (below).
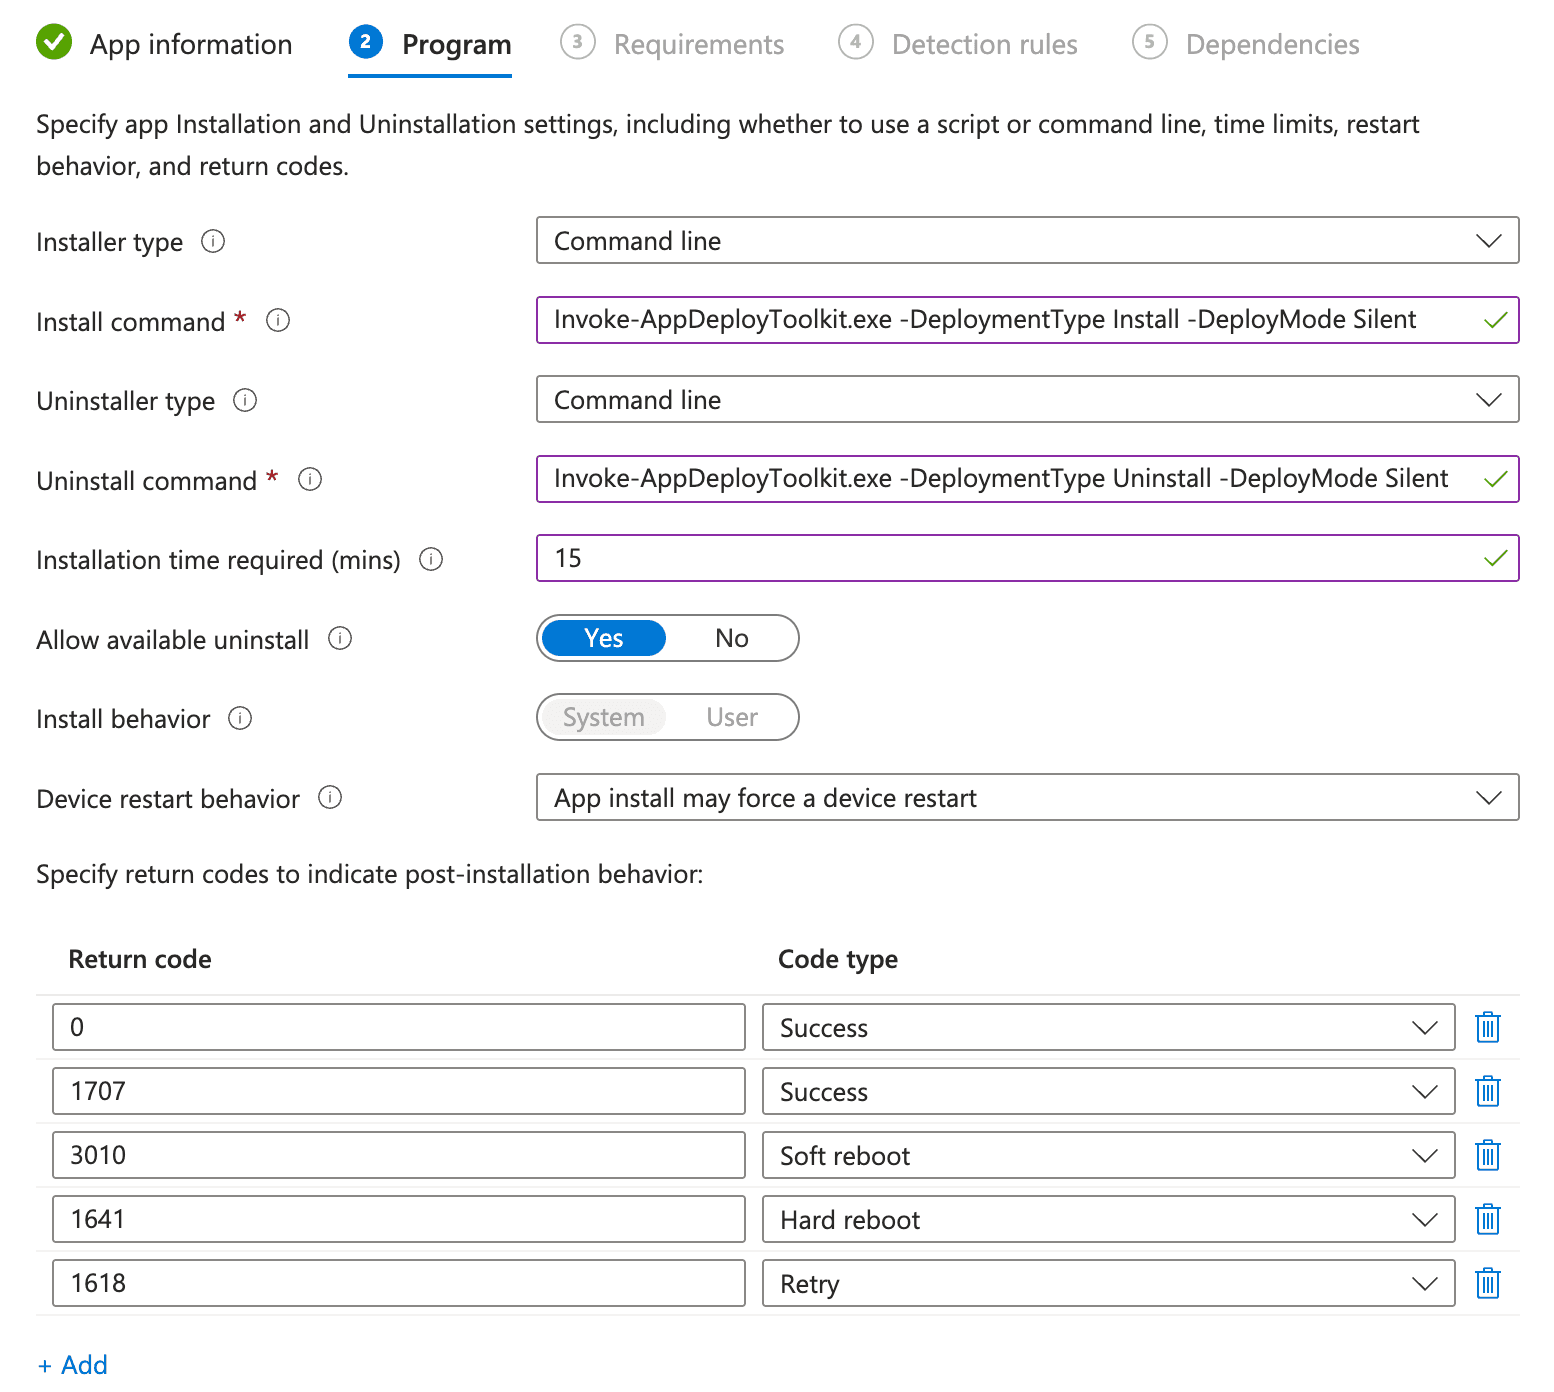
Step 3: Configure Program settings
On the Program step, use:
| Setting | Value |
|---|---|
| Install command | Invoke-AppDeployToolkit.exe -DeploymentType Install -DeployMode Silent |
| Uninstall command | Invoke-AppDeployToolkit.exe -DeploymentType Uninstall -DeployMode Silent |
| Install behavior | System |
When replacing the package on an existing app, verify install and uninstall commands still match the table above.
Step 4: Configure Requirements
On Requirements, target the correct Windows versions and architectures (x64 and/or ARM64 as needed).
Step 5: Configure detection rules
You can use a custom script (recommended for version-specific rollout) or file-based detection.
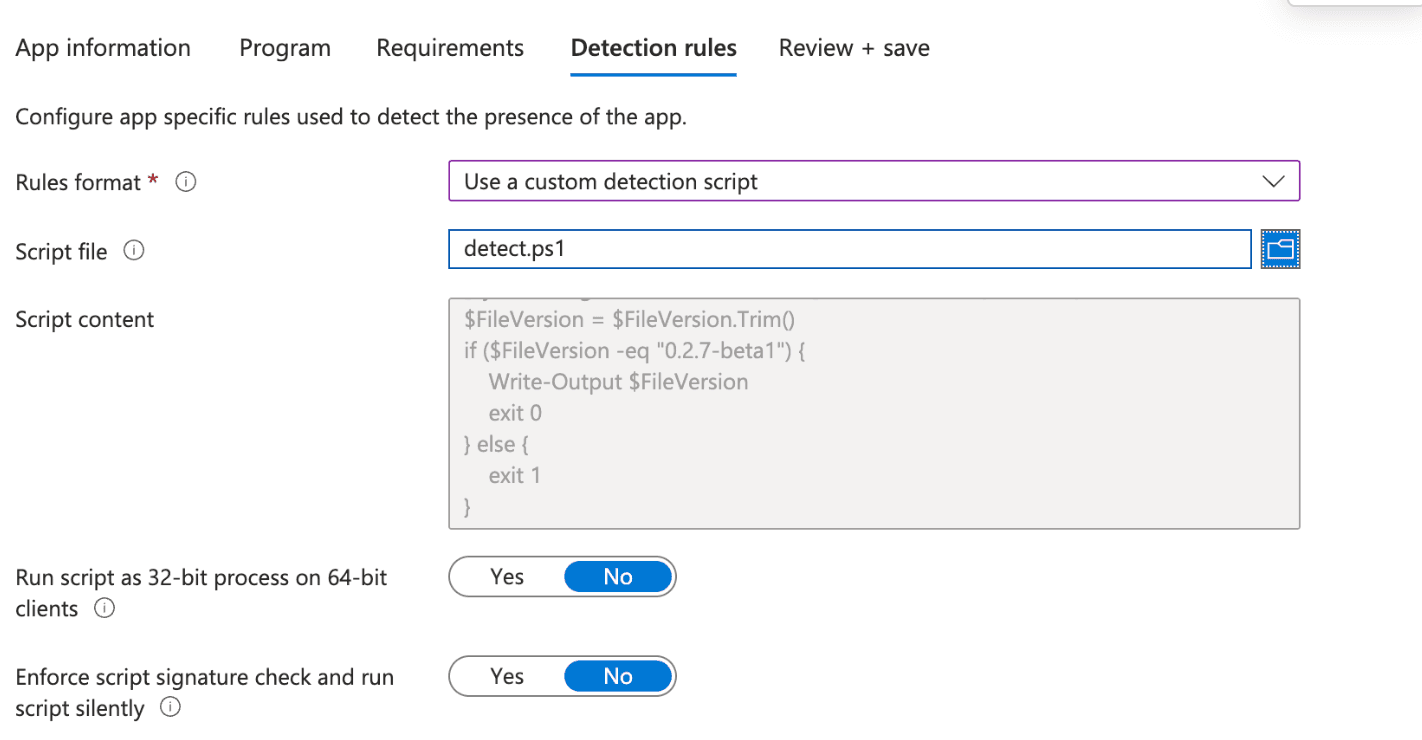
Option A: Custom detection script (recommended)
This approach uses a PowerShell script to detect the installed version. It is more flexible and makes version upgrades easier to manage.
| Setting | Value |
|---|---|
| Rules format | Use a custom detection script |
| Script file | Upload your .ps1 |
| Run script as 32-bit process on 64-bit clients | No |
| Enforce script signature check and run script silently | No |
Example detect-pult-agent.ps1 -- change the version string to the build you deploy:
$FilePath = "C:\Program Files\Pult Agent\pult-agent.exe"
if (-not (Test-Path $FilePath)) {
    exit 1
}
$FileVersion = [System.Diagnostics.FileVersionInfo]::GetVersionInfo($FilePath).FileVersion
$FileVersion = $FileVersion.Trim()
if ($FileVersion -eq "0.2.10-beta1") {
    Write-Output $FileVersion
    exit 0
} else {
    exit 1
}
When you roll out a new agent version, update the script, bump the comparison string if needed, and re-upload it to Intune.
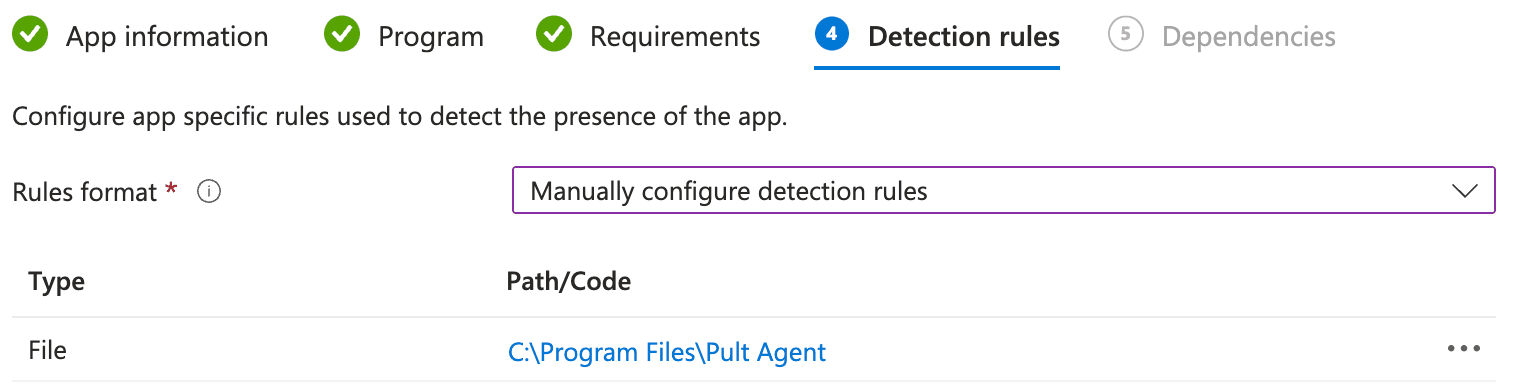
Option B: File-based detection
Use this when checking presence only (no exact version match).
| Setting | Value |
|---|---|
| Rules format | Manually configure detection rules |
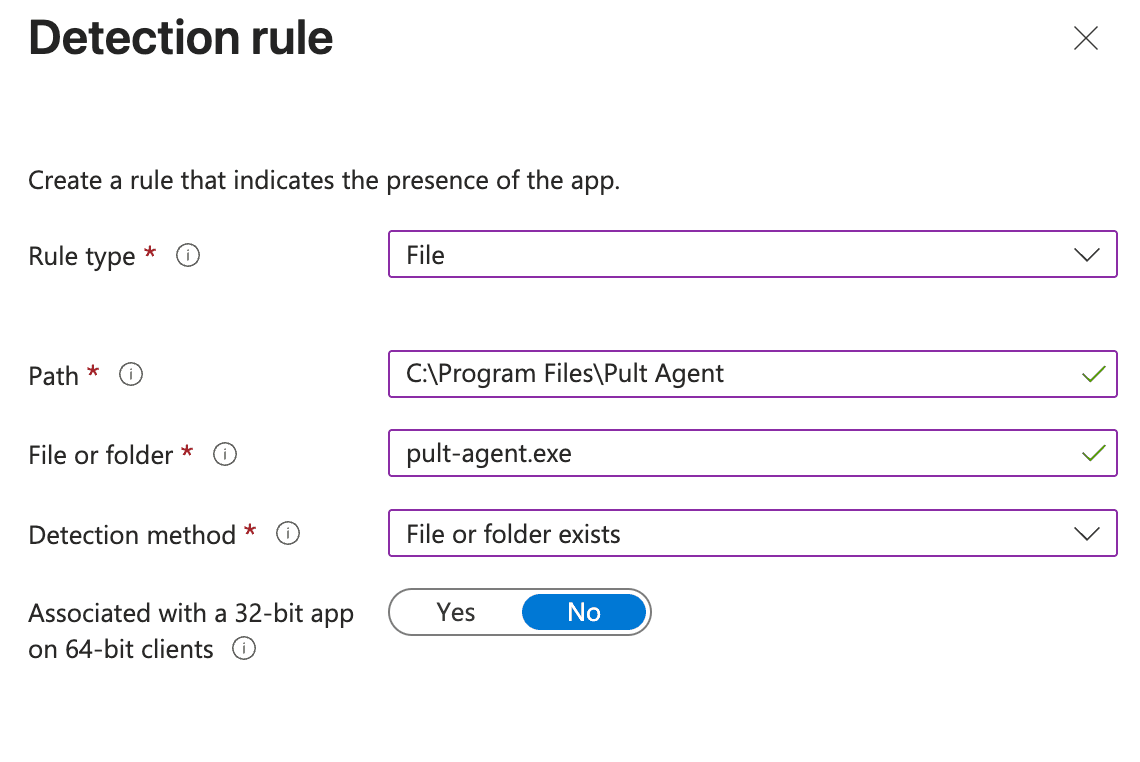
Add one rule:
| Setting | Value |
|---|---|
| Rule type | File |
| Path | C:\Program Files\Pult Agent |
| File or folder | pult-agent.exe |
| Detection method | File or folder exists |
| Associated with a 32-bit app on 64-bit clients | No |
Step 6: Finish the wizard
Complete Dependencies, Supersedence, Assignments, and any remaining steps per your org.
Verification
After assignment, Intune deploys the app; PSADT runs the MSI and your post-install block.
After successful installation:
- Pult Agent running on the device
- System tray icon (bootstrap may still be in progress)
![]()
Signed-in users are not disrupted by token provisioning: the token file is consumed and deleted when read, regardless of whether the agent was already running.
In the Pult Dashboard, open Settings → Presence → Device Authentication to approve pending requests.
Troubleshooting
| Issue | What to check |
|---|---|
| Bootstrap token not picked up | Token path must be under the logged-in user %APPDATA%\com.pult.agent\ -- not SYSTEM profile. |
| Agent does not launch after install | Use Start-ADTProcessAsUser for launch; SYSTEM cannot start interactive tray apps for users. |
| Detection reports failure | Script version string must match 0.2.10-beta1 exactly after trimming FileVersion. |
| Install succeeds but Intune shows fail | Re-open Program commands -- Intune sometimes wipes them after a package refresh. |
Last updated on May 13, 2026, 12:21 PM